Linux系统
常用用命令
防火墙
1.防火墙停止:systemctl stop firewalld.service
2.查看状态:systemctl status firewalld
3.docker启动:systemctl start docker
4.开机启动:systemctl enable docker
5.彻底关闭自器:systemctl disable firewalld.service查看端口
lsof -i:8080
netstat -aptn
//查看内存
free -m查看历史
history查看安装位置打印路径
which java
echo $JAVA_HOME
安装JDK
1.安装:rpm -ivh /vspn30/soft/jdk/jdk-8u261-linux-x64.rpm
2.查看版本:java -version创建多层目录
mkdir -pv /s/s查看日志
tailf /var/log/messages查看容量
df -h
df -hT
查看当前目录大小
du -ah
du -sh *看已安装的所有软件包
yum list installed查看ip
ip a
//查看主机名
hostname查看cpu内存
cat /proc/cpuinfo   # 查看CPU信息
查看CPU信息(型号)
cat /proc/cpuinfo | grep name | cut -f2 -d: | uniq -c


# cat /proc/cpuinfo | grep name | cut -f2 -d: | uniq -c
   8 Intel(R) Xeon(R) CPU      E5410  @ 2.33GHz
(看到有8个逻辑CPU, 也知道了CPU型号)

# cat /proc/cpuinfo | grep physical | uniq -c
   4 physical id   : 0
   4 physical id   : 1
(说明实际上是两颗4核的CPU)

# getconf LONG_BIT
  32
(说明当前CPU运行在32bit模式下, 但不代表CPU不支持64bit)

# cat /proc/cpuinfo | grep flags | grep ' lm ' | wc -l
  8
(结果大于0, 说明支持64bit计算. lm指long mode, 支持lm则是64bit)


# free -m        # 查看内存使用量和交换区使用量
# df -h         # 查看各分区使用情况
grep MemTotal /proc/meminfo  # 查看内存总量

free -h

Mem:内存的使用信息
Swap:交换空间的使用信息
total:总计物理内存的大小
used:已使用物理内存
free:可用物理内存
shared:多个进程共享的内存总额
buffers/cached:缓存缓冲使用物理内存大小
available:还可以被应用程序使用的物理内存大小https://www.jb51.net/article/158029.htm
https://m.php.cn/article/443929.html
//看cpu核数
cat /proc/cpuinfo | grep name | cut -f2 -d: | uniq -c
//看磁盘分区
df -h
fdisk -l
//看内存大小
free -h
//查看操作系统
cat /proc/version
cat /etc/redhat-release
cat /etc/issue 或cat /etc/redhat-release
//Ubuntu
cat /etc/lsb-release查看行号
:set nu查看路由
ip route查看定时任务
crontab -l备份文件
cp backup198.sh ./backup198.sh.backupCentos7安装
下载好centos7
http://isoredirect.centos.org/centos/7/isos/x86_64/
https://mirrors.aliyun.com/centos/7/isos/x86_64/
参考自己的微博
https://blog.csdn.net/baidu_37313657/article/details/104879818?spm=1001.2014.3001.5502
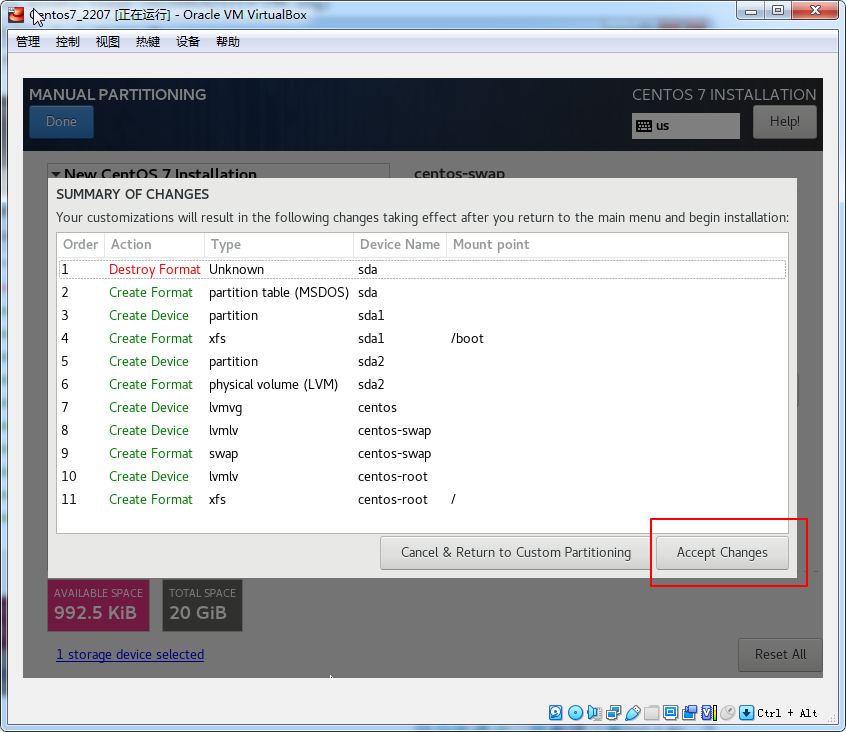
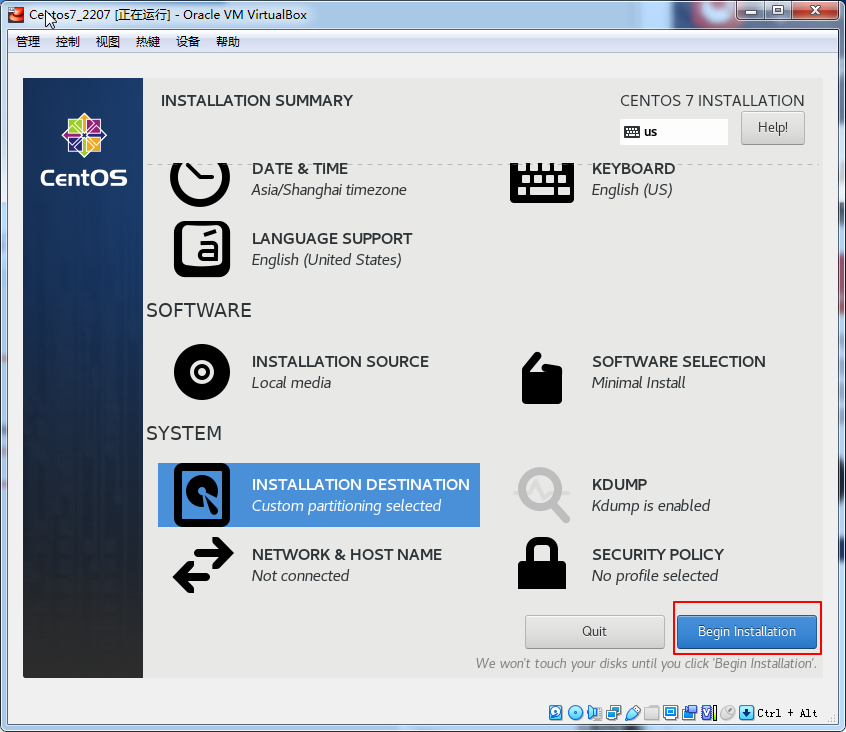
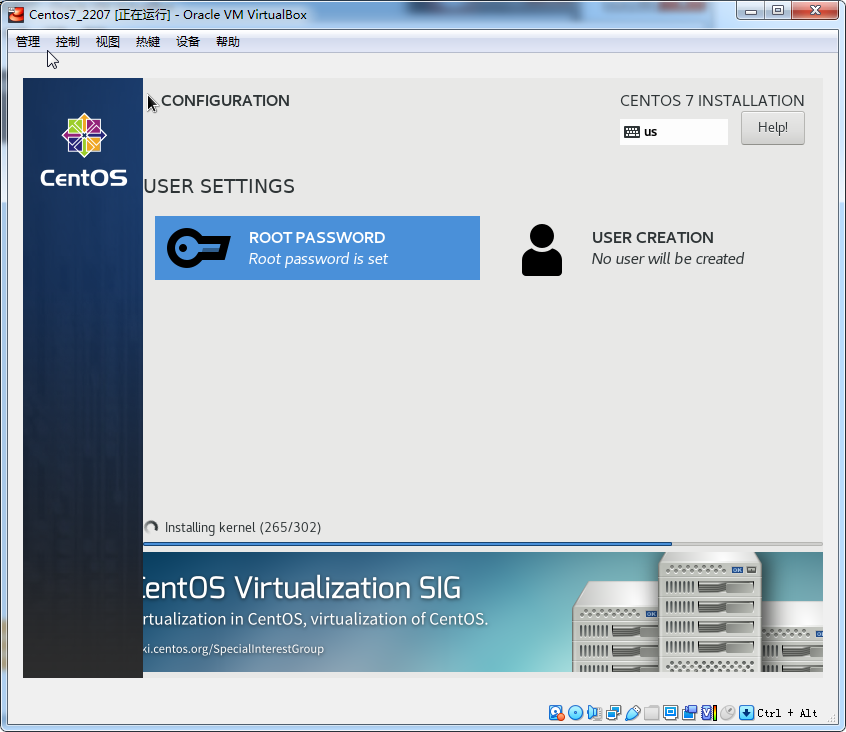
安装
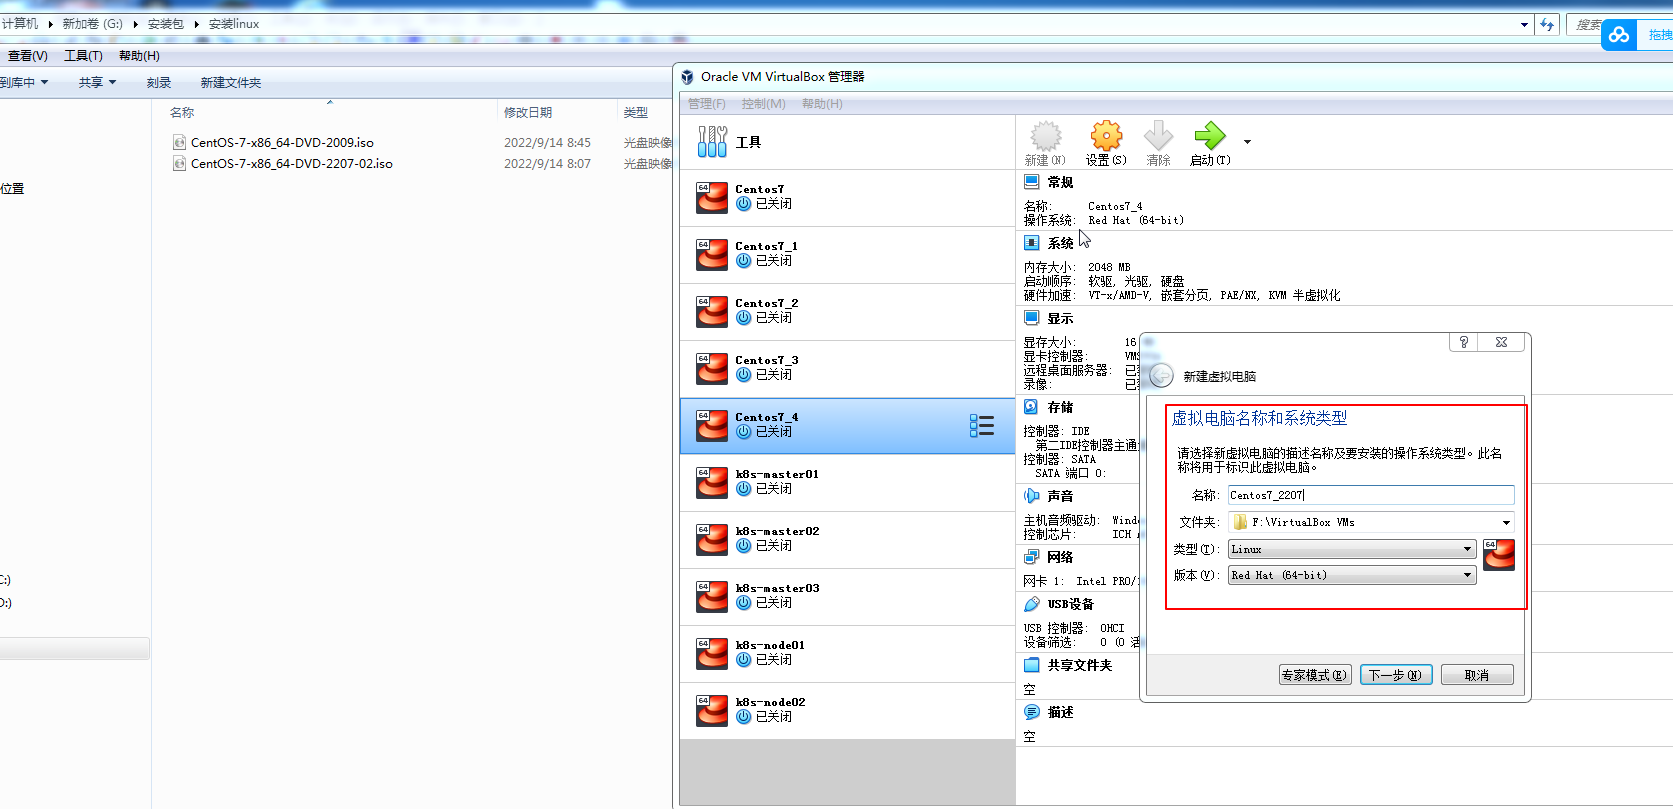
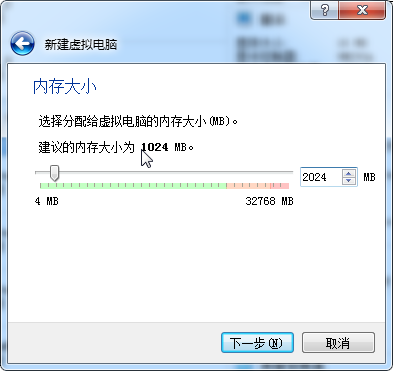

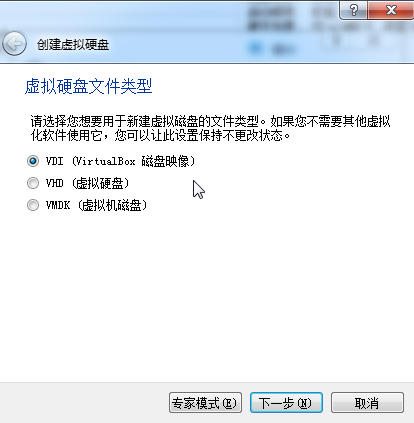
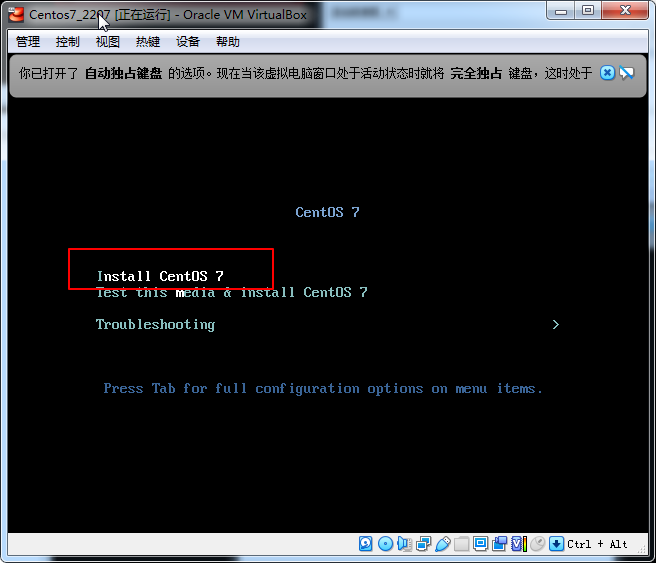
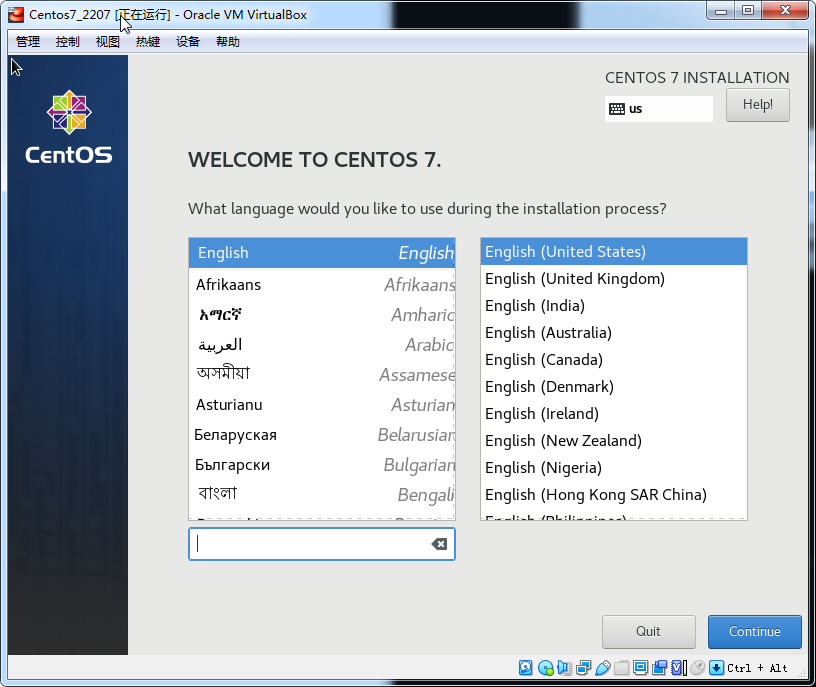
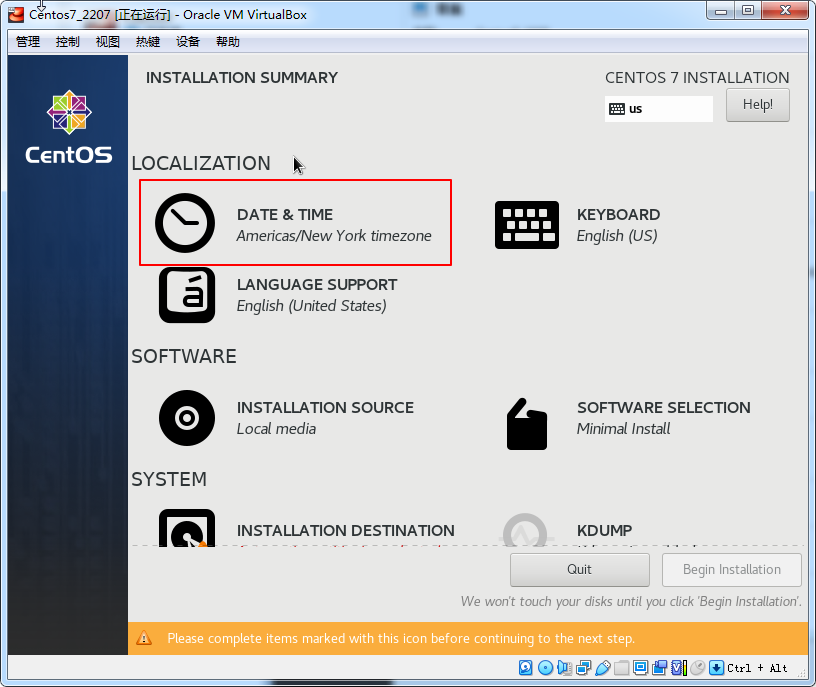
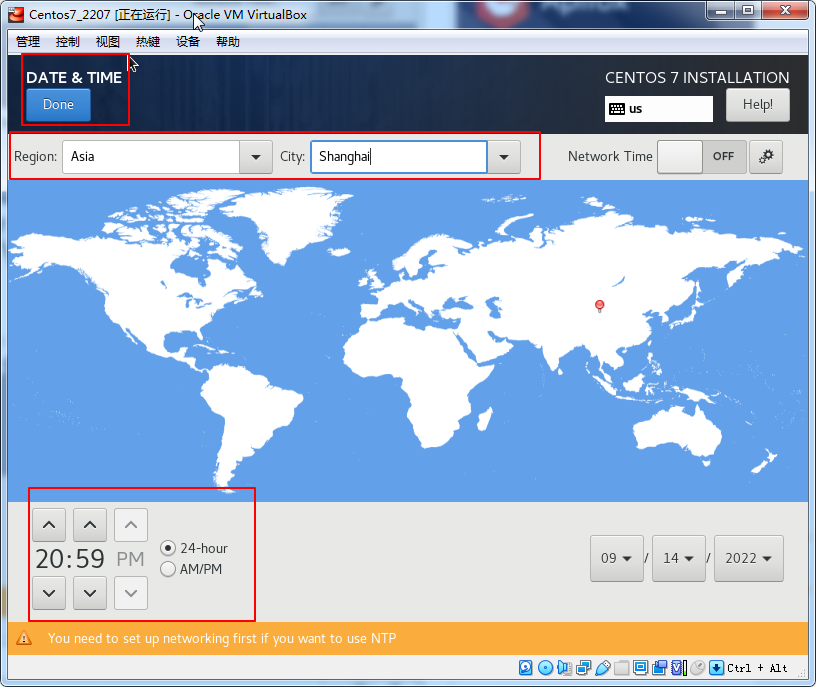
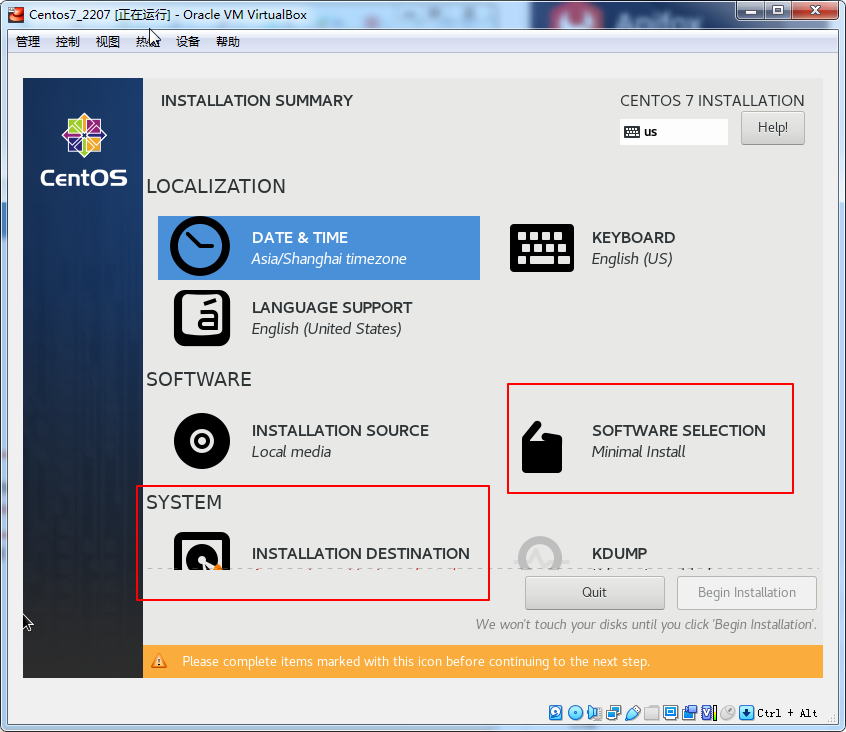
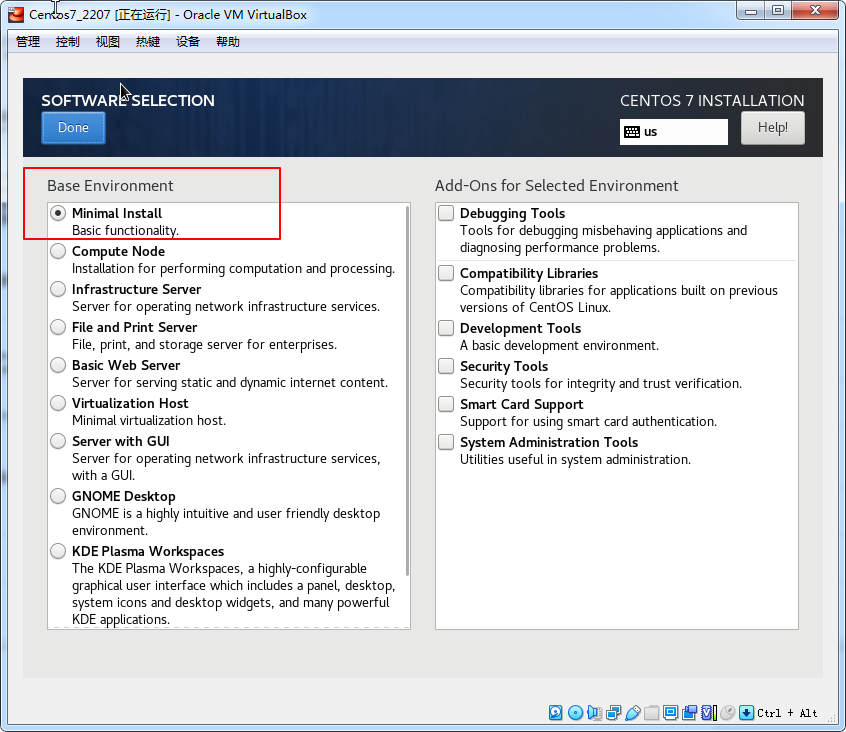
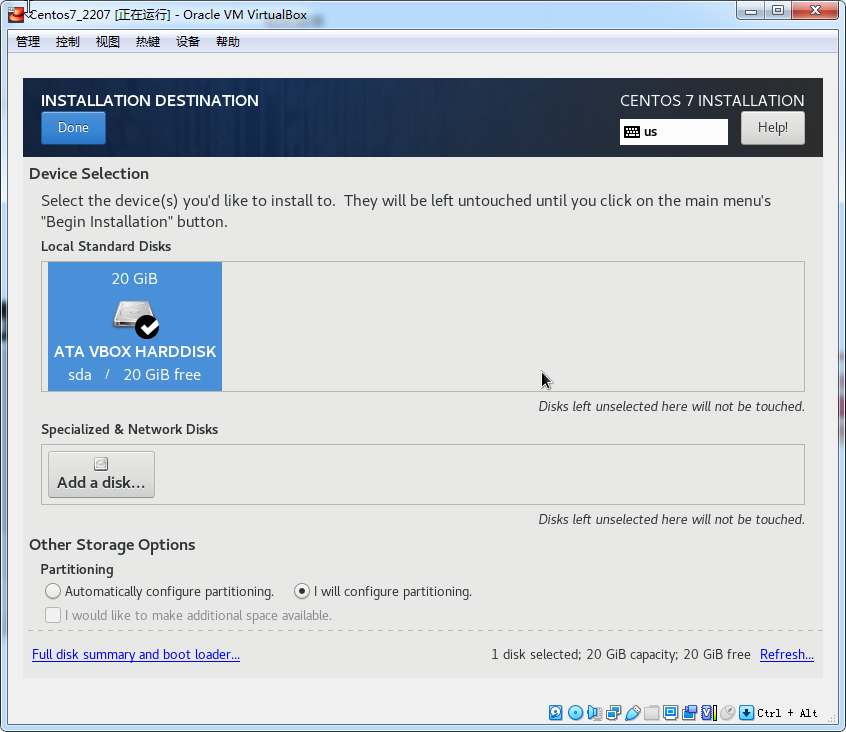
点击done

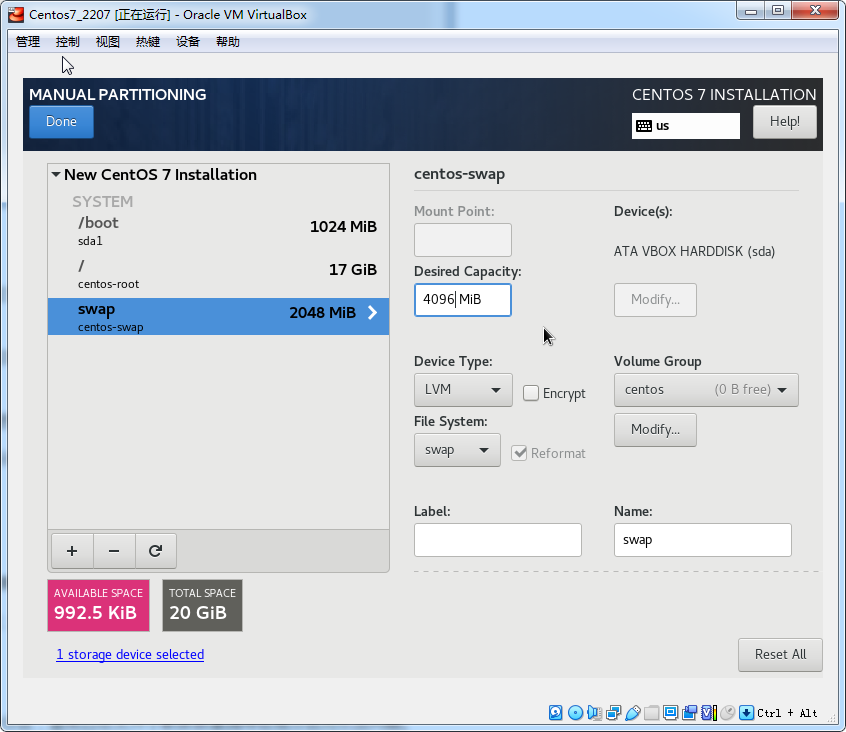
分区解释
boot分区: 作用:引导分区,包含了系统启动的必要内核文件,即使根分区顺坏也能正常引导启动 一般这些文件所占空间在200M以下
/分区(根分区): 作用:所有的文件都从这里开始,你可以比喻为Windows的C盘,但其实有区别。如果你有大量的数据在根目录下(比如FTP等)可以划分大一点的空间
swap分区: 作用:类似于Windows的虚拟内存,在内存不够用时占用硬盘的虚拟内存来进行临时数据的存放,而对于linux就是swap分区
分区建议:建议是物理内存大小的2倍,比如你电脑是4G的物理内存,swap分区可以是8G
分区格式:swap格式
可选的分区home分区 作用:存放用户数据,HOME的结构一般是 HOME/userName/userFile,如果不分则默认在/目录下
分区建议:如果用户数据多可以将此分区适当增大,请参考“根分区”分区建议;一般硬盘的主要容量几乎都在Home分区和根分区下
var分区 作用:用于log日志的文件的存放,如果不分则默认在/目录下
分区建议:如果你安装的linux是用于服务器或者经常做日志分析,请划分var分区,避免日志文件不断膨胀塞满导致根分区而引发问题。
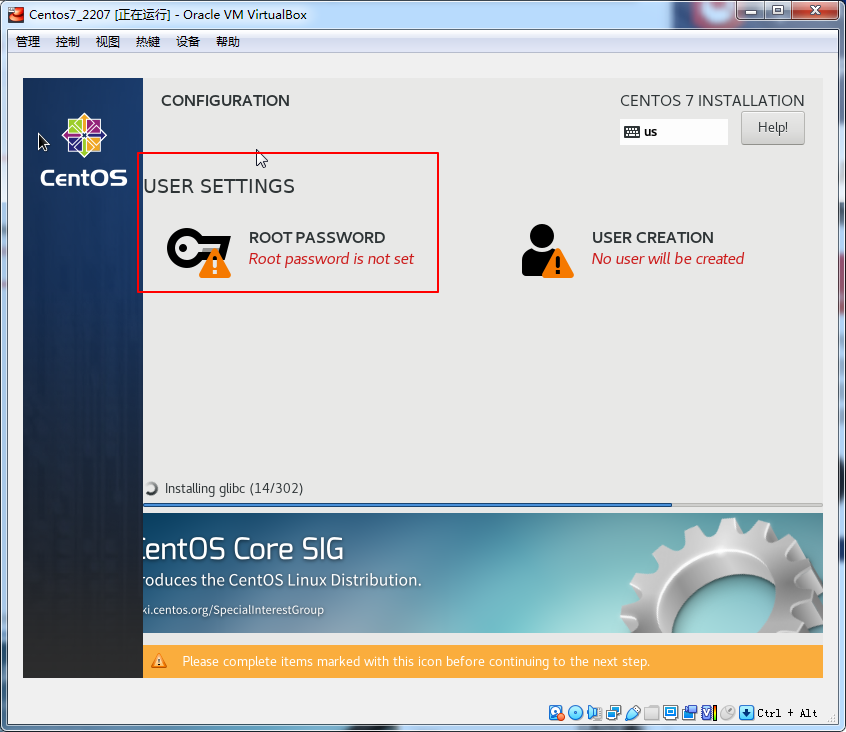
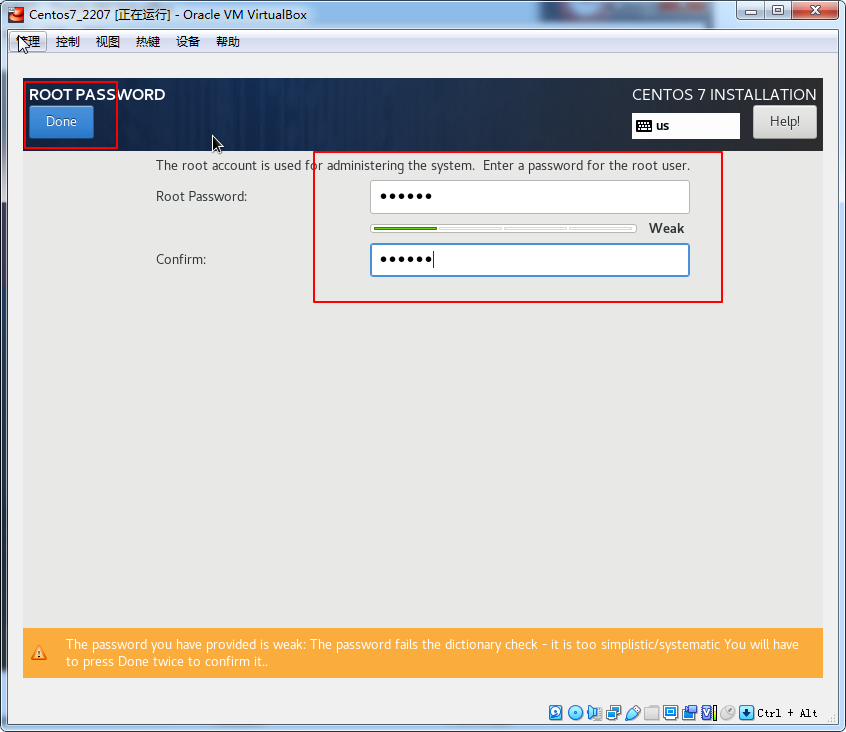
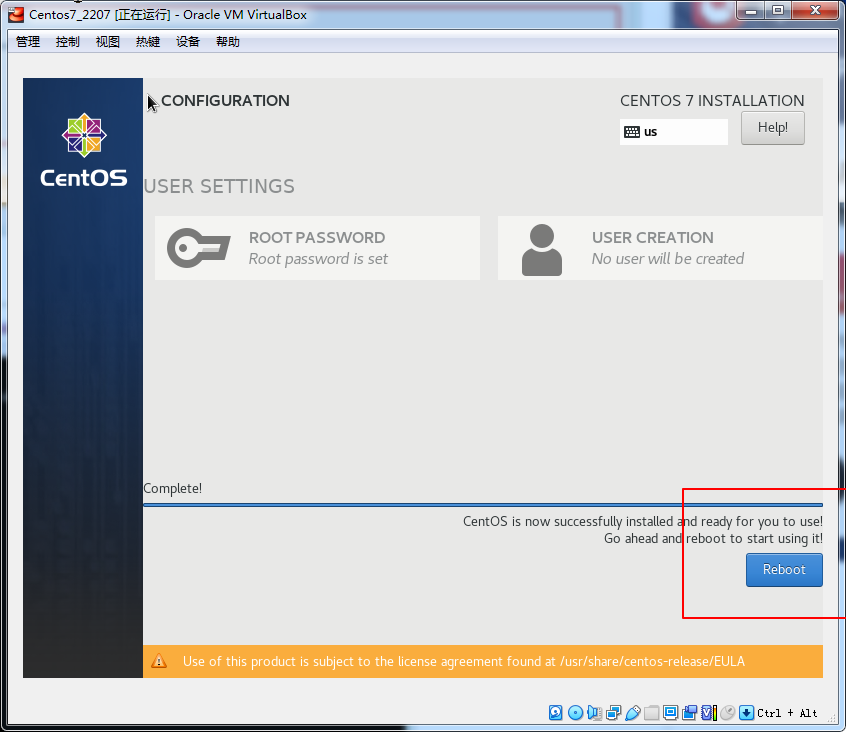
密码123456按两次完成即可

ip addr
vi /etc/sysconfig/network-scripts/ifcfg-enp0s3
service network restart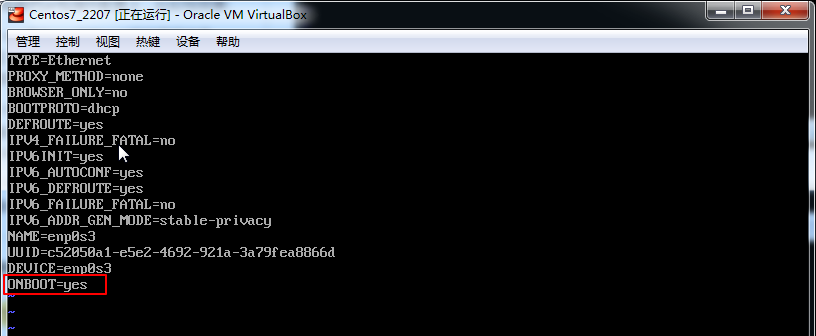

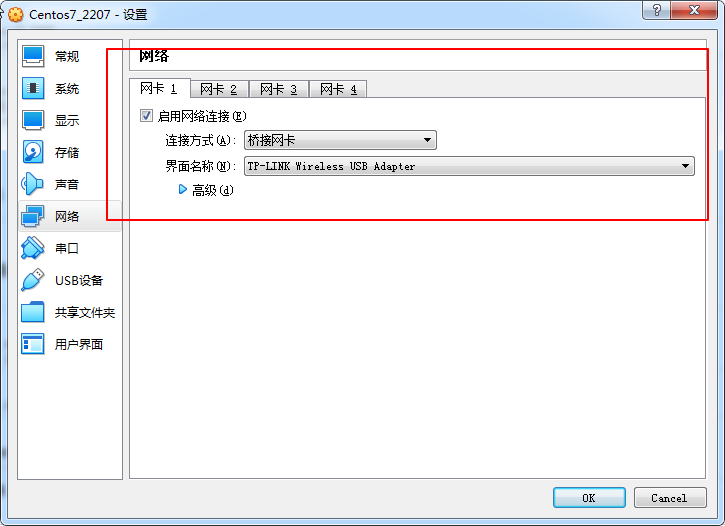
关闭虚拟机设置桥联网络

使用xshell连接
查看版本
cat /etc/redhat-release
yum install net-tools
yum install vim
设置固定ip
https://blog.csdn.net/baidu_37313657/article/details/106212775?spm=1001.2014.3001.5502
IPADDR=192.168.124.235
NETMASK=255.255.255.0
GATEWAY=192.168.1.1关闭防火墙
彻底关闭防火墙,查看上面linux命令即可
出现报错

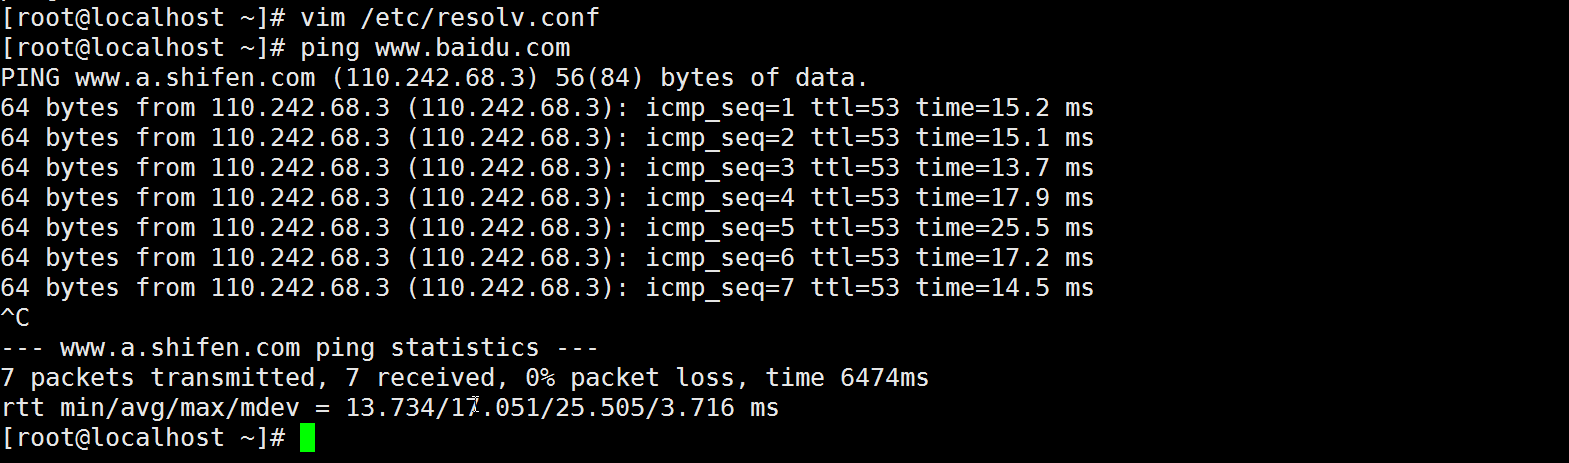
添加DNS
nameserver 8.8.8.8
#向resolv.conf文件中添加下面内容
nameserver 114.114.114.114
替换源
https://developer.aliyun.com/mirror/centos?spm=a2c6h.13651102.0.0.3e221b11fTtGf0
备份
mv /etc/yum.repos.d/CentOS-Base.repo /etc/yum.repos.d/CentOS-Base.repo.backup替换
curl -o /etc/yum.repos.d/CentOS-Base.repo https://mirrors.aliyun.com/repo/Centos-7.repo
# 或
wget -O /etc/yum.repos.d/CentOS-Base.repo https://mirrors.aliyun.com/repo/Centos-7.repo升级内核
参考文章
https://www.cnblogs.com/chalon/p/15004067.html
cat /etc/redhat-release
uname -r
# 升级为4.19 k8s学习用
yum update -y --exclude=kernel* && reboot
wget http://193.49.22.109/elrepo/kernel/el7/x86_64/RPMS/kernel-ml-devel-4.19.12-1.el7.elrepo.x86_64.rpm
wget http://193.49.22.109/elrepo/kernel/el7/x86_64/RPMS/kernel-ml-4.19.12-1.el7.elrepo.x86_64.rpm
yum -y localinstall kernel-ml*  #安装内核所有包;rpm -ivh kernel-ml-*  #安装内核所有包;
安装完成后如图

更改内核启动顺序
# 更改内核启动顺序
grub2-set-default  0 && grub2-mkconfig -o /etc/grub2.cfg
grubby --args="user_namespace.enable=1" --update-kernel="$(grubby --default-kernel)"
grubby --default-kernel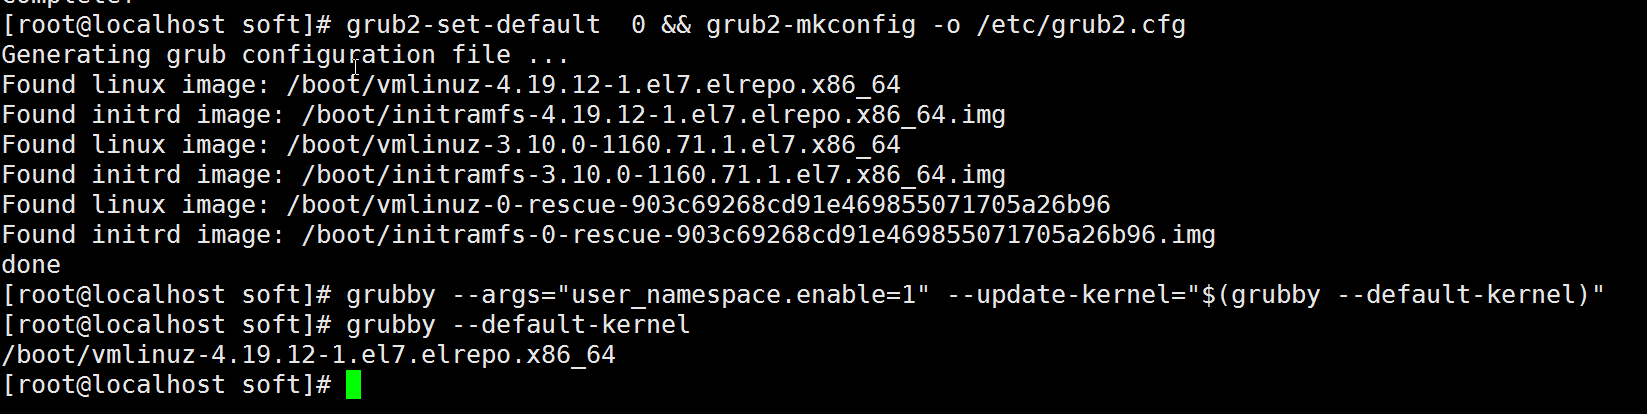
重启服务器 reboot

查看 uname -r

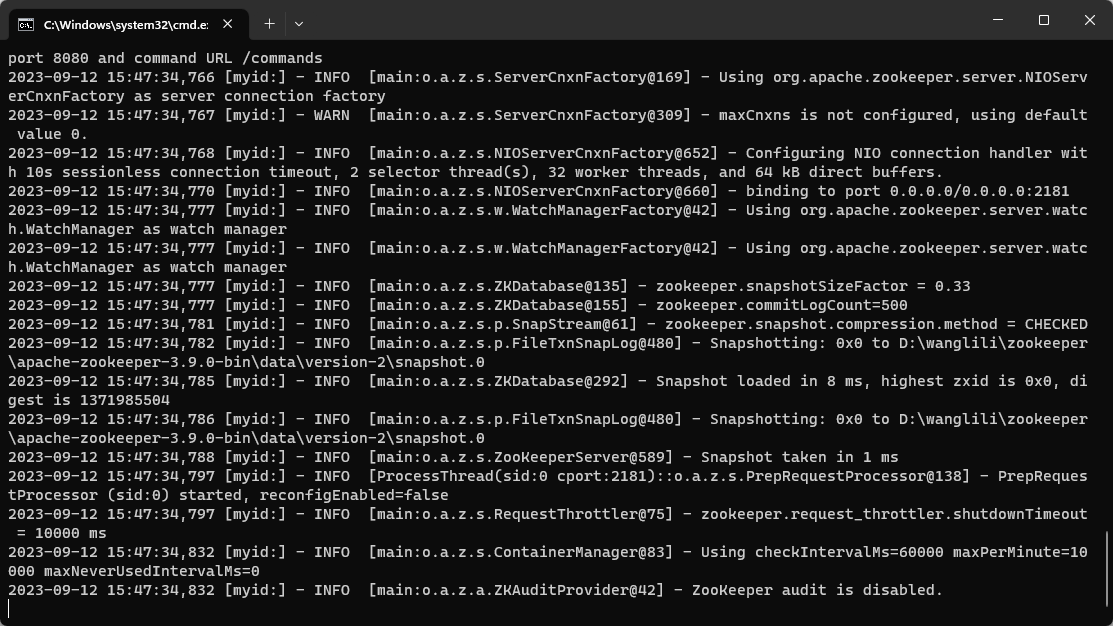
zookeeper安装
zookeeper安装
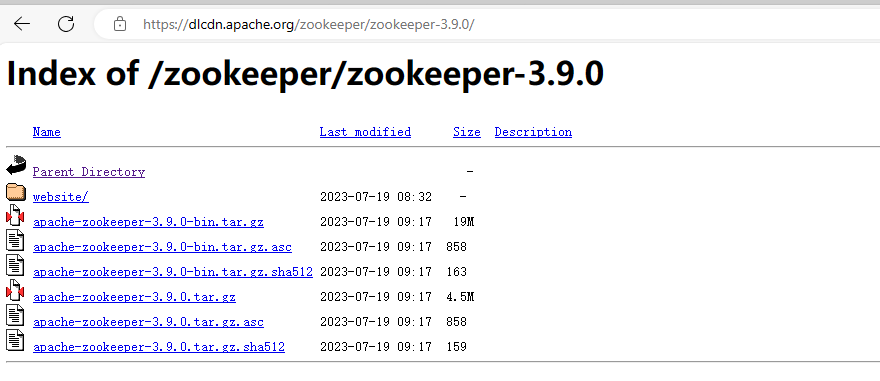
https://dlcdn.apache.org/zookeeper/
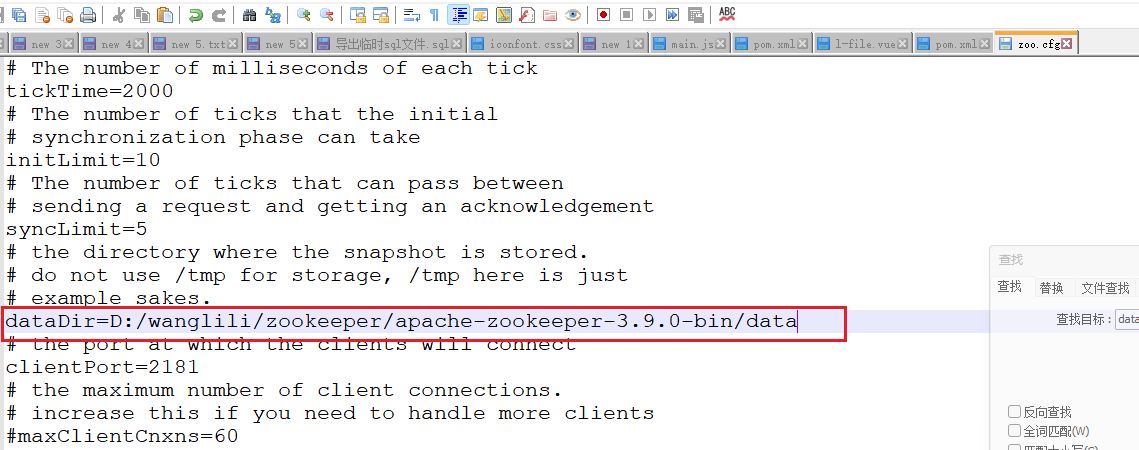
进入 D:\wanglili\zookeeper\apache-zookeeper-3.9.0-bin\conf 复制zoo_sample 改为 zoo 同时修改如图
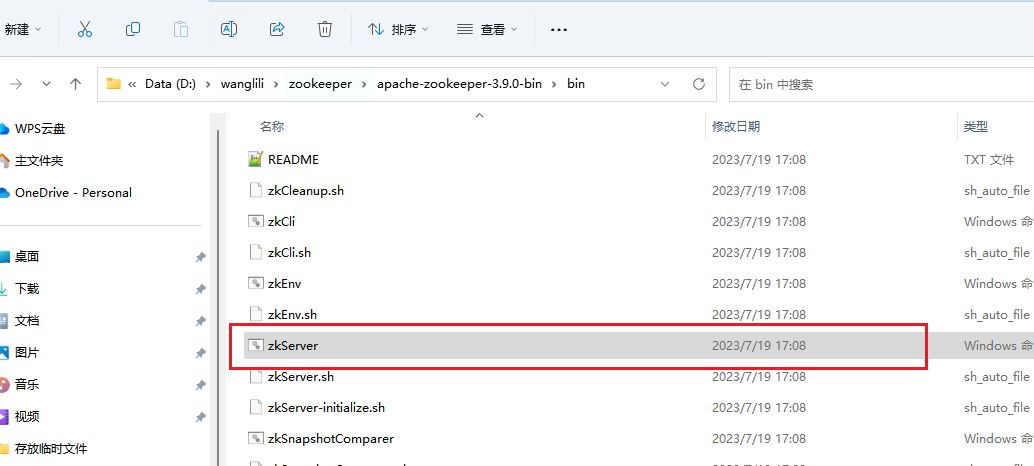
安装位置 D:\wanglili\zookeeper\apache-zookeeper-3.9.0-bin\bin
运行结果如图